Starting Point - Midsomer Norton South Station. Finish Point - Bath Green Park Station. Distance - 13.2 Miles
This walk followed on from a walk along the former Great Western line from Frome to the site of Welton and Midsomer Norton station. We walked across Midsomer Norton to the site of the Somerset and Dorset station in order to walk the route of the Somerset and Dorset Railway to Bath following an overnight stay in Radstock. More information about the history of the Somerset and Dorset Railway can be found on the Wikipedia article.
A preservation group operates at the Midsomer Norton South station where most of the original buildings have survived and been restored.
Below - The preserved Midsomer Norton South Station seen on a previous trip earlier in the year.

The bridge immediately east of the station that took the railway across Silver Street is gone but on the other side of the road there is a path up to the top of the embankment and the course of the railway is now a foot and cycle path.
Though the embankment survives most of the way to Radstock a couple of bridges have been removed. At Pit Road the path descends the embankment to cross the road at ground level and at Radstock Road the path deviates on to the former Great Western route. The first major piece of engineering work to survive is the Five Arches viaduct that carried the S&D over the GWR.
Below - The Five Arches Viaduct.

From the east of the bridge there is a path up to the top of the S&D embankment and it is possible to reach the top of the viaduct, though it is a bit overgrown.
We spent the night in Radstock in the Radstock Hotel, this can be seen in the old map above on the market square, just across the road from the stations of the S&D and GWR and would have been ideally situated for passengers arriving by train.
The market hall itself is now Radstock's museum. Where the station stood a monument to the nearby Ludlow's Colliery has been built.

Beyond the monument car parking now occupies the site of the station and we have to follow Waterloo Road which was immediately north of the railway, infarct there is a slight dogleg in the road where it used to go round the back of a signal box.
Below - Bridge abutments for bridge that carried the Tyning Colliery Tramway over the S&D

Below - Retaining wall for the former S&D

Where the retaining wall can be seen there is access to the path that follows the course of the railway.
Below - Former British Wagon Works buildings, the site is now in other industrial uses.

Below - Bridge over Church Hill

Below - Information board commemorating accident at Braysdown Colliery sidings

Approaching Shoscombs the path leaves the course of the railway and we follow the cycle route which takes a lengthy detour off the old railway to east of Welton.
The route crosses Green Street and it is worth heading south a few yards to see where the railway crossed. On the west side of the road the abutments survive, on the east side though is a five arch viaduct which has been converted in to a home.
Below - Former viaduct at Shoscombe converted to a home

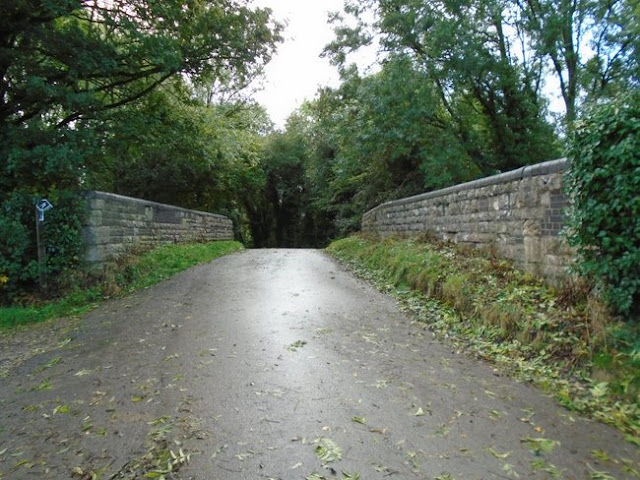
Following the roads to Hang Hill we next encounter the former railway where the road crossed over it at the point where its name changes to Gray's Hill.
Below - Hang Hill / Grays Hill bridge over the former S&D
From Grey's Hill we turn left on to Littleton Lane.
Below - WW2 Pill box in Stoney Littleton

Below - Bridge taking Littleton Lane over the trackbed

Turning off High Street in Wellow on to Station Road brings us to the former station which is now a private house.
Below - Former Wellow station

Returning to High Street it becomes Bull's Hill outside the Village and Ford Road where it crosses under the railway on a viaduct that still stands.
Below - Viaduct carrying the railway over Bull's Hill / Ford Road

East of the viaduct a riding stables has been built on the course of the railway and the former trackbed can be accessed behind the Rider's Rest Tea Rooms where a former footpath bridge survives.
Below - Footpath bridge

From here to Midford the railway follows the contours of the land through a quite rural area of farmland. A few former farm crossings survive.
Below - Bridge over a farm track.


The railway passed over the village of Midford on a viaduct which still stands. It also passed over the Great Western's Camerton Branch. This was used in the Titfield Thunderbolt film, the Camerton branch being used for scenes on the Titfield branch and the mainline expresses passing over the viaduct on the S&D route. It seems strange that even the main line in that film would succumb to the railway closures depicted in the film.
Below - Midford Viaduct.

Below - A view from Midford Viaduct. The Camerton branch is in the line of trees, this was the location of a famous scene in the Titfield Thunderbolt where the 14xx tank on the branch line toots it's whistle and the express passing over the viaduct responds with a whistle.

Below - Outtakes from the Titfield Thunderbolt film shot around Midford.

Below - Viaduct carrying Camerton branch over the B3110, also the location of a Titfield Thunderbolt scene where the train passes the bus earmarked to replace it.

Below - Former Camerton branch passing under the S&D Midford viaduct.

Just beyond the viaduct was Midford's station. Though the wooden buildings are gone the platform remains. The outline of the station buildings can be seen with evidence of the where the toilets once were and the various rooms in the buildings.
Below - Former Midford Station


Below - Midford Station back in 1962 (image from Wikipedia)

Below - Information board on the station site.

Below - The steps to access the station from Old Midford Road still in place.

Below - Remains of the signal post (marked SP on the old map) just north of the station.

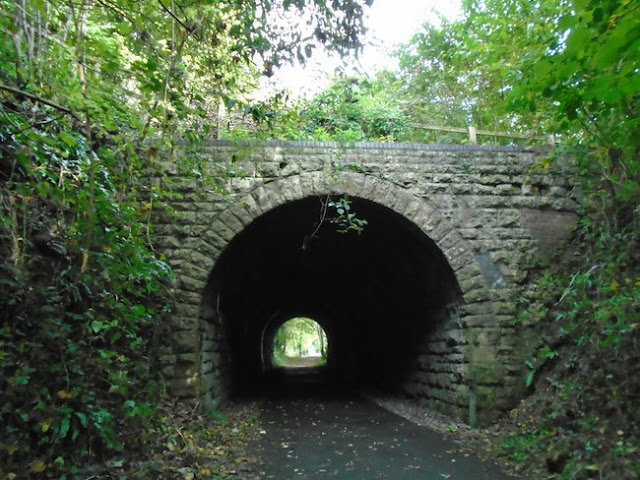
Below - The short tunnel just north of the station taking the line under Tucking Mill Lane.
Below - Tuckingmill Viaduct

We come to the first of the two tunnels that give this section of cycle route its name, Combe Down Tunnel. Over a mile long, it was the longest tunnel without a ventilation shaft. This caused notorious problems with conditions on the steam engines working thorough the tunnel and resulted in a fatal accident on 20th November 1929 when an engine crew became overcome by fumes, as the train reached the descent in to Bath it ran away and crashed in the yard in Bath killing the driver and two railway staff in the yard.
After closure of the route the tunnel was boarded up, it reopened as part of the cycle route in 2013. The tunnel now has lighting throughout, though it is fairly low LED lighting. It can take 15 to 20 minutes to walk through the tunnel with quite some time before the light at the other end appears, it is quite a strange experience.
Below - The south entrance of Combe Down Tunnel.

Below - The north end of Combe Down Tunnel

Below - Information board about Combe Down Tunnel

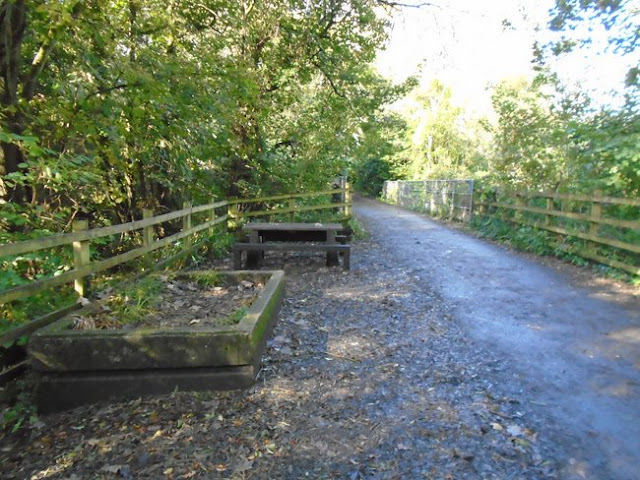
Beyond the tunnel was a platelayer's hut and a concrete bins for storing ballast for track maintenance. A picnic bench now occupies the site of the platelayer's hut.
Below - Former footpath bridge over the S&D

Below - Another ballast bin as the trackbed passes through the Lynchcombe Valley.

Below - Bridge over footpath to Lynchcombe Vale Road

Below - Information board at the entrance to Devonshire Tunnel.

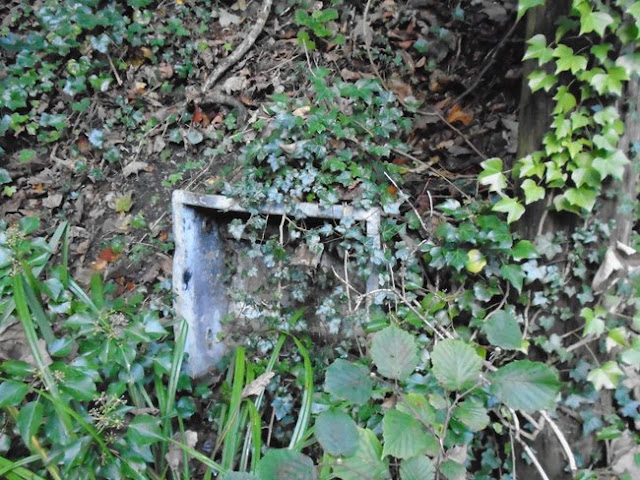
Below - Phone cupboard at Devonshire Tunnel
Below - Devonshire Tunnel

Below - Devonshire Tunnel, prior to reopening as a foot and cycle path the Bath end of the tunnel was filled in, an access shaft was built in front of the tunnel mouth which had to be demolished when when the tunnel mouth was unearthed.

Below - Former footpath bridge

In the above old map a single siding can be seen just off Melcombe Road, this was used by the local Co-op. An information board now marks the site. (Below)

Below - Claude Avenue bridge. It can be seen that the bridge has been widened as what was once a footpath through fields became the suburbs of Bath.


Below - Another information board provided near Bellotts Road where the Somerset & Dorset crossed over the Great Western line through Bath Spa.

Looking at the modern Google Map satellite images of Bath it is clear that the trackbed in to Bath Green Park has been redeveloped. A number of car dealerships occupy part of the trackbed in to Bath, as do the buildings on Stothert Avenue. Stothert Avenue is named after the crane maker Stothert & Pitt whose works previously stood there.
At the time of my visit (2021) the site of the gas works which could still be seen on the Google Maps satellite images was fenced off, presumably for the land to be prepared for redevelopment. After Bath Green Park, the S&D and the Midland line from Bristol closed to passengers the Midland line was retained for a while as a freight only line to supply coal to the gas works. I previously visited the Bristol to Bath Railway by bike.
Land around the approach to Green Park station previously occupied by the goods yards and engine sheds is now occupied by a Sainsbury's and Homebase store and the car parking for them.
Below - Former railway bridge over the River Avon on the approach to Green Park station.


Fortunately when the supermarket was built the former station which had been used for car parking since its closure was retained. As well as still providing car parking space, various shops and stalls occupy the former train shed and the main station building now houses a bar and restaurant.


There were four tracks under the train shed roof, just two platforms and run round loops, several cross country services would reverse at Green Park on to the S&D having arrived from the north on the Midland line.
Below - A bus calls at the stop alongside the former Green Park Station on Midland Bridge Road.

Below - The facade of the former station, now in use as a bar and restaurant.

No comments:
Post a Comment