Starting Point - Greenfield Station. Finishing Point - Stalybridge Station. Distance -10 Miles
I previously mentioned the railway and canal tunnels at Standedge on my Standedge Canal Tunnel article, having journeyed through the canal tunnel on a boat tour. I have also travelled through the 1894 built two track railway tunnel countless times but you don't get to see anything. The 1848 and 1871 built single track railway tunnels are disused but are only accessible to Network Rail staff.
When the railway route was widened to four tracks with the construction of the 1894 tunnel obviously the lines up to the tunnel needed similar capacity. Between Stalybridge and Diggle this was achieved by creating a loop line parallel to the existing route through Mossley and Greenfield as there wasn't space to widen the existing route. Being easier to build than the tunnel, this opened before the new tunnel in 1885. Four intermediate stations were provided from 1886, though these closed early as the line was primarily used by freight traffic. Remarkably remains of a few of these stations survive. In 1966 the route was closed completely apart from a small stub at the Stalybridge end which served the Hartshead Power Station.
From a passing train the top of north portal of the tunnel the loop line enters shortly after diverging from the main line can just be seen, though this is not accessible. A footpath starts where the south portal of the tunnel once stood.
I started at Greenfield station and followed the Huddersfield Narrow Canal until the footpath connecting it to Kenworthy Gardens, from there I walked along High Street to Ryefields Drive. There are an upper and lower Ryefields Drives and the Saddleworth Linear Path links them, this is the path that follows the railway and this was the location of the now filled in tunnel portal.
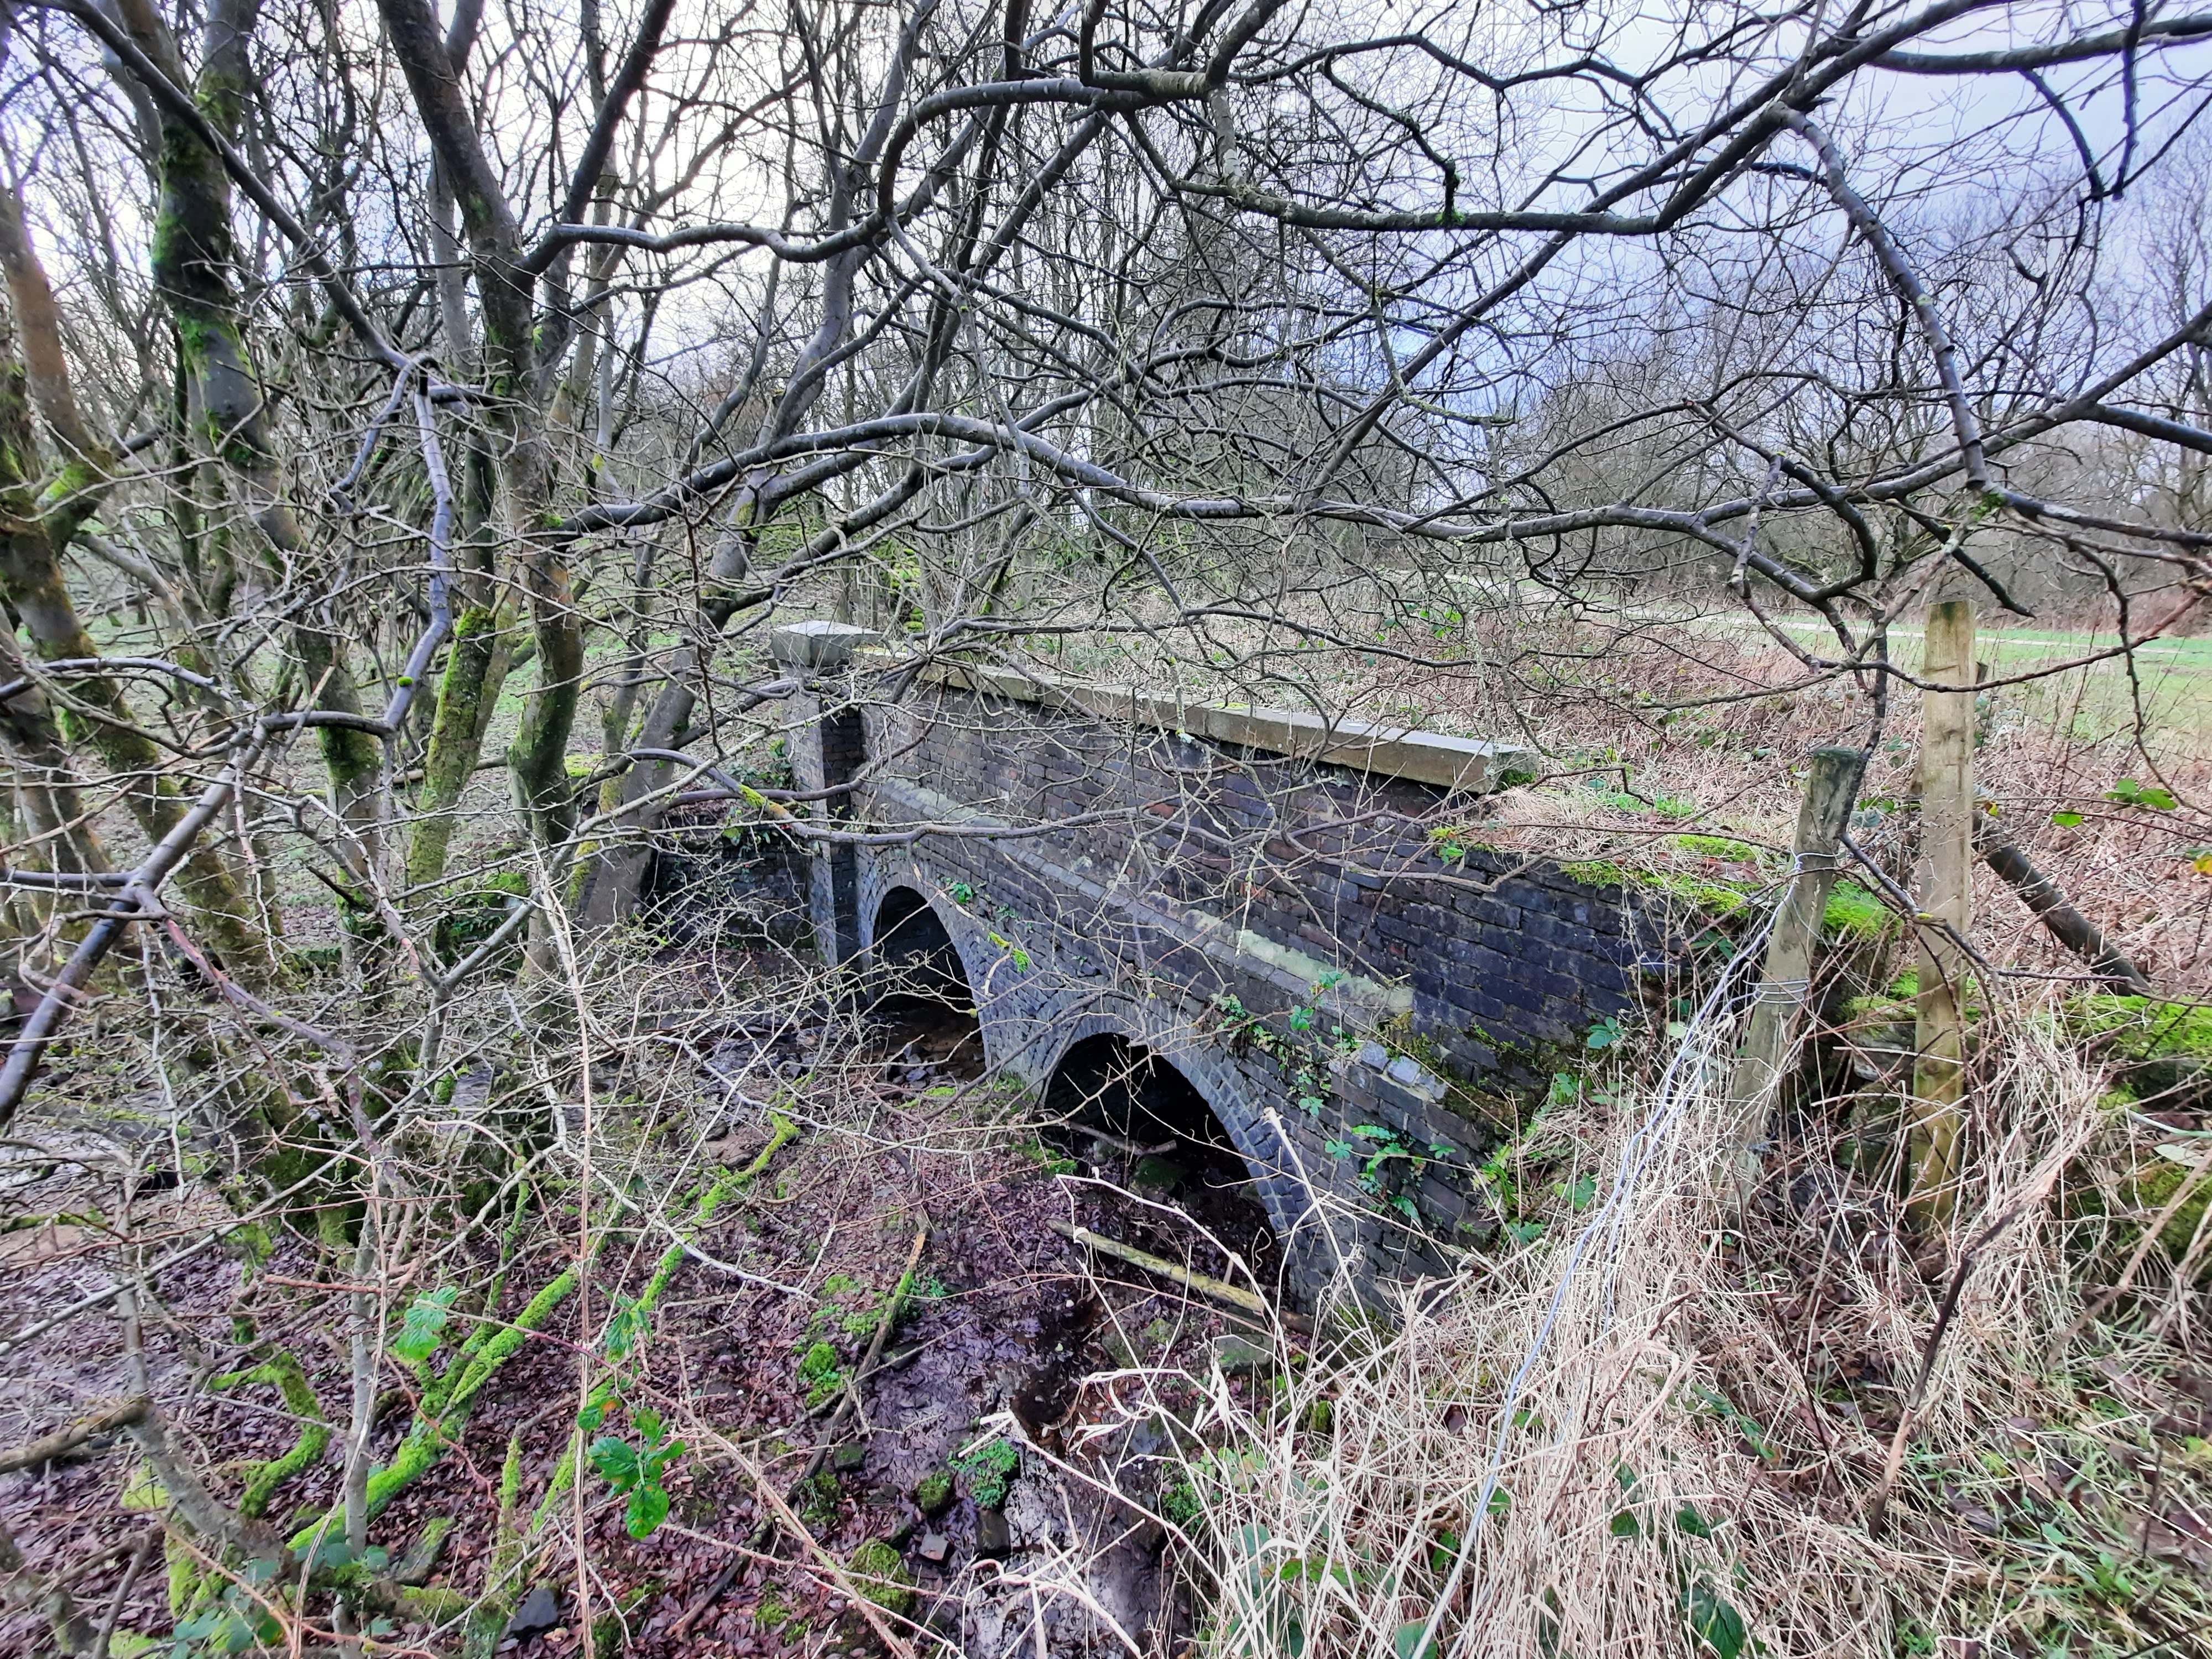
Below - The first evidence of the railway, the culvert over Pickhill Brook.
Below - The bridge over Church Road, the original span has been replaced with a higher footbridge above the original abutments.

Below - Information panel at the Church Road bridge.

Uppermill
Below - The former Uppermill station. There was nothing to see at track level, just high wooden fences at either side of the path. Another higher footbridge replaces the rail bridge on the original abutments. From street level the station buildings can be seen. The station closed back in 1917.

A leisure centre now occupies the site of Uppermill's goods yard.
Below - The bridge taking Rush Hill Road over the former railway. A concrete arch has been built under the partly filled in original bridge, presumably a means of strengthening it. It can be seen there were two spans on the original bridge, the filled in one on the right having been for the lines in to the goods yard.

Below - The bridge taking the footpath from Carr Lane to Fur Lane over the former railway.

The bridges over Higher Arthurs and Chew Valley Road and the Friezland Viaduct are gone. The path continues, with a few slight wiggles, at ground level to the site of Friezland station seen at the bottom of the above map.
Friezland
Below - Despite also closing in 1917 the station building at Friezland survives.


Another viaduct south of the station has been removed. Like Uppermill, the goods yard at Friezland was located south of the station.
Below - A playing field now occupies the site of Friezland's goods yard. This pillar once supported the crane shown on the above map. On the side the letters LNW Crewe are cast in to it.

The tunnel is filled in and the path continues via a series of zebra crossings complete with high buttons and red and green horse signals for horse riders using the path which is a bridleway at this point. A few footpath over bridges have been removed with the paths now meeting that at rail level.
Below - Remains of a couple of the footpath bridges.

Below - The bridge under Winterford Lane.

Micklehurst
Below - Micklehurst station closed in 1907 but the station building is still in good condition. It is not shown on the old map as a station having already closed but it can be seen on Station Road towards the centre of the map.


Below - The BR Totem style sign on the station building is a bit misleading, the station having been closed by the London & North Western Railway and not seen passenger use under the LMS or BR.

Another viaduct has been removed south of Micklehurst station.
Below - The stub of the abutment at the south end of the viaduct at Micklehurst on Egmont Street.

Again the goods yard was south of the station. At Micklehurst this is now occupied by a large industrial complex which is not accessible. Instead I had to take a short detour via the canal alongside the former railway.
Below - An archway at the side of the canal which looks to have led to the goods yard, though this isn't shown on the map.

Next to the canal lock a footpath returns to the course of the railway.
Below - Remains of the bridge over the farm track to Kershaw Hay, on the right a path leads up to the track level.

Below - Bridge taking another farm track over the former railway.

We now get to the stub of the line that survived a little longer to serve the power station.
Below - A concrete yard lamp at the site of Millbrook Sidings.

Below - Remains of a single road engine shed in Millbrook Sidings that seems to have been very recently demolished.

Below - Remnants of an inspection pit and buffer stops. Presumably this shed would have serviced a shunter used for the power station traffic.


Below - A piece of retaining wall around the site of the signal box.

Below - I'm not sure what this tower was and can't see it on the old maps. It may be associated with the reservoir on the other side of the line.

Below - The remains of the conveyor that took coal from the sidings to the power station on the other side of the canal.


Below - The large goods shed is still largely intact.

Below - It was possible to photograph through the fencing across the doorways. Locations of hoists for lifting goods to the upper levels could be seen.


Below - Remains of the goods offices on the south end of the building.


Below - A ballast bin and remnants of signalling equipment.

Below - The roadway in to the goods yard.

Staley & Millbrook
South of the goods yard another viaduct has been removed and the path emerges on to Grove Road. From the back of the Canal & River Trust depot a path returns to the railway at the site of Staley & Millbrook station which closed in 1909.
Below - The site of Staley & Millbrook station.

The line approached Stalybridge on another viaduct which has been demolished. The path descends the embankment to what the old map shows as North Road but is now just a footpath.
Below - Where the canal narrows slightly the railway would have crossed on a viaduct.

Below - The line went straight from a viaduct to a tunnel under Cocker Hill. The tunnel portal is now half way up a slope up from the River Tame, seen here from the footpath along the former Higher Mill Road.

Stalybridge
The tunnel emerged alongside that of the original (and surviving) line just outside Stalybridge station. I walked along Market Street to the suriving station.
Below - Stalybridge station entrance today.

Below - Outside the station a couple of stone walls are the remains of the Lancashire & Yorkshire Railway's own station. The former L&Y line to Manchester Victoria survives but now runs in to the former LNWR & Great Central joint platforms via Victoria Junction

Below - A train to Manchester Victoria in one of the recently reopened bay platforms.

No comments:
Post a Comment